We’ve got a special update today! Badriel, the background artist for Aurora’s Nightmare, offered to write about his creation process and what it was like designing the general look of the game world. Enjoy!
-Josiah
Hi, Badriel here, I make bgs (backgrounds) for Aurora’s Nightmare. This time I’ll be writing a bit about the creation process and sharing some of my techniques. Aurora’s Nightmare is a very unique game with architectural perks not seen anywhere else. It’s a world quite similar to ours technologically, but different in its culture and architectural taste. It’s a bit similar to modern gothic, however in its high light form. Blacks and dark colours rarely exist here, most of the buildings are very light instead. When I was given the task of making the backgrounds for Aurora’s Nightmare, I scratched my head for a while after reading the overview of the world. Modern-gothic world isn’t something you see often. In the end I’ve decided to incorporate the functionality of minimalism with the spirit of gothic engineering. So you’ll see flying buttresses, arcades and rose windows merged with the blocky, light, modern houses with big windows letting in a lot of light.
(Except in certain specific cases where things are much darker, such as in the example background used below. –Josiah)
As for the actual process of creation, I usually divide my work into 3 to 4 phases, which allow me to provide a steady preview of progress and allow room for any possible changes or edits.
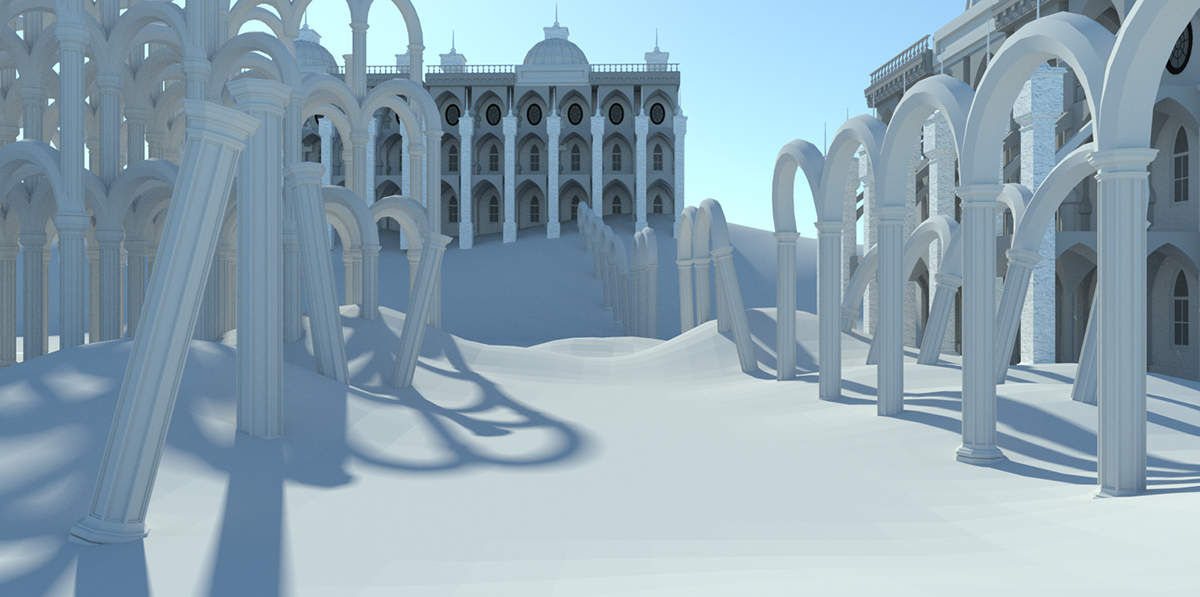
Most often I start with a simple 3d base of a bg. The image might seem complex at first, but upon the closer inspection, you’ll notice it’s basically two buildings and two sets of columns and arches. I don’t always use 3d base models, a lot of backgrounds, like forests, meadows and other environments without buildings are completely drawn by hand from start.
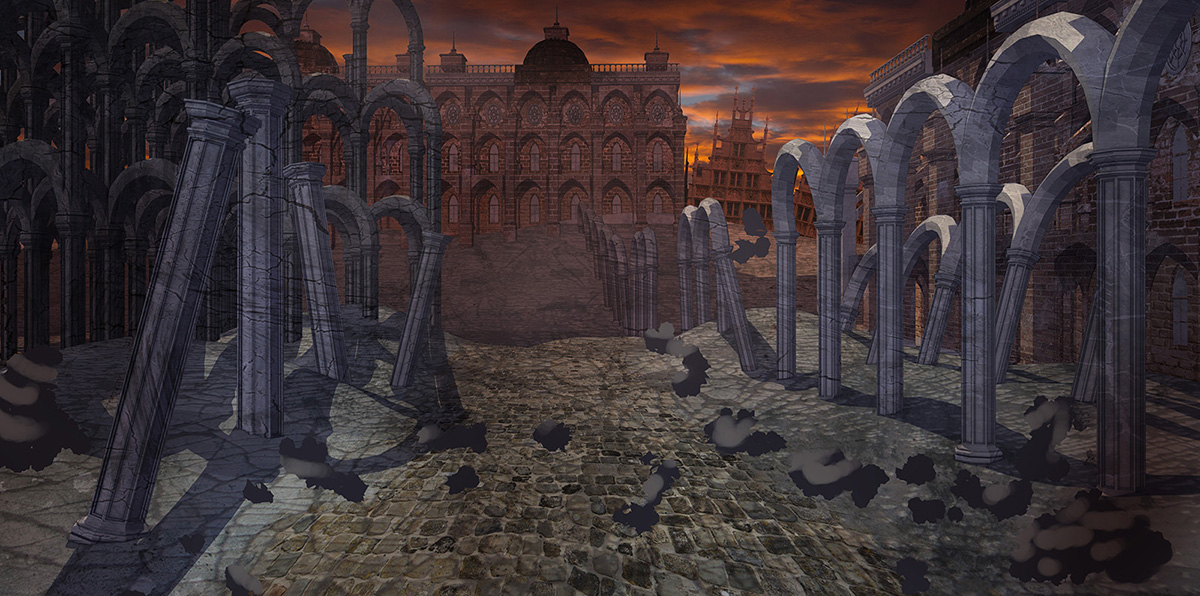
Depending on how detailed the previous phase was, or how much I feel I need, I finalize the 3d base and present a render. This piece didn’t undergo any drastic modelling changes from phase 1. Instead, I focused on adding textures and shading it. You can also see some sketchy blobs on the ground, which inside my head were rocks and rubble. In this stage I sometimes start drawing over the 3d model. In this case I was able to do it. Sometimes, however, a model undergoes a lot of changes since phase 1, so I leave drawing over for the stage 3. Generally, this phase is the most difficult, because it either involves a lot of modelling or a lot of drawing or texturing.
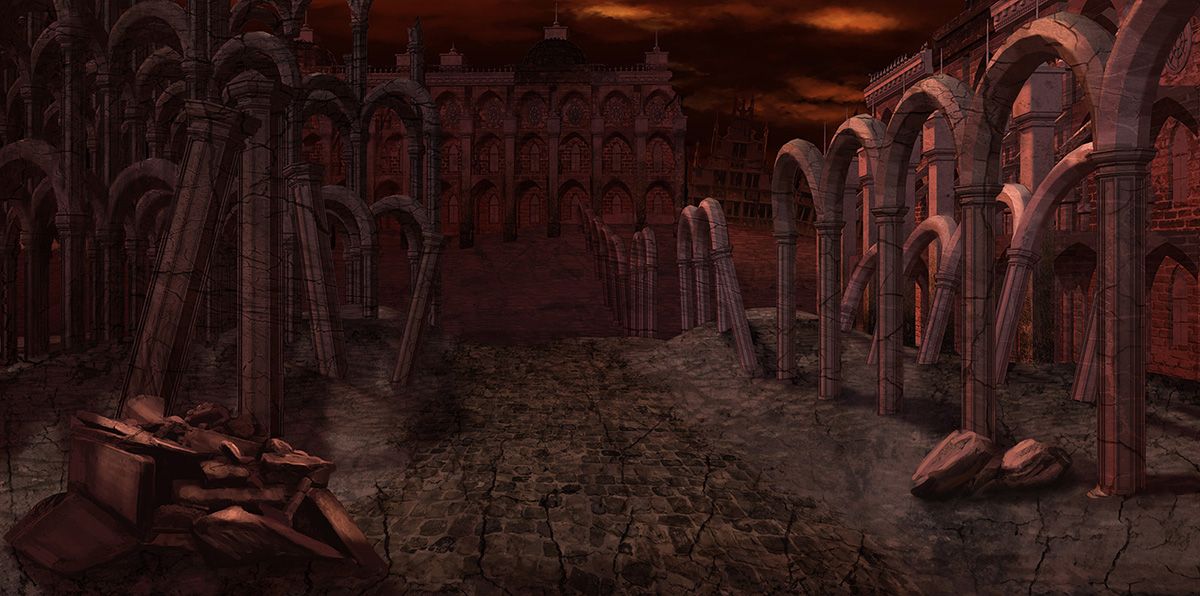
This stage is just drawing, adjusting mood and shading. If you take a look at the arches and columns, you’ll notice the blocky shadows are smoother, and there’s more damage and details too. I’ve drawn the rubble on the ground, edited or added details to the most of the other elements as well. The shading is much darker and reflects the mood of the place better. Basically by now the hardest part of my work is done.
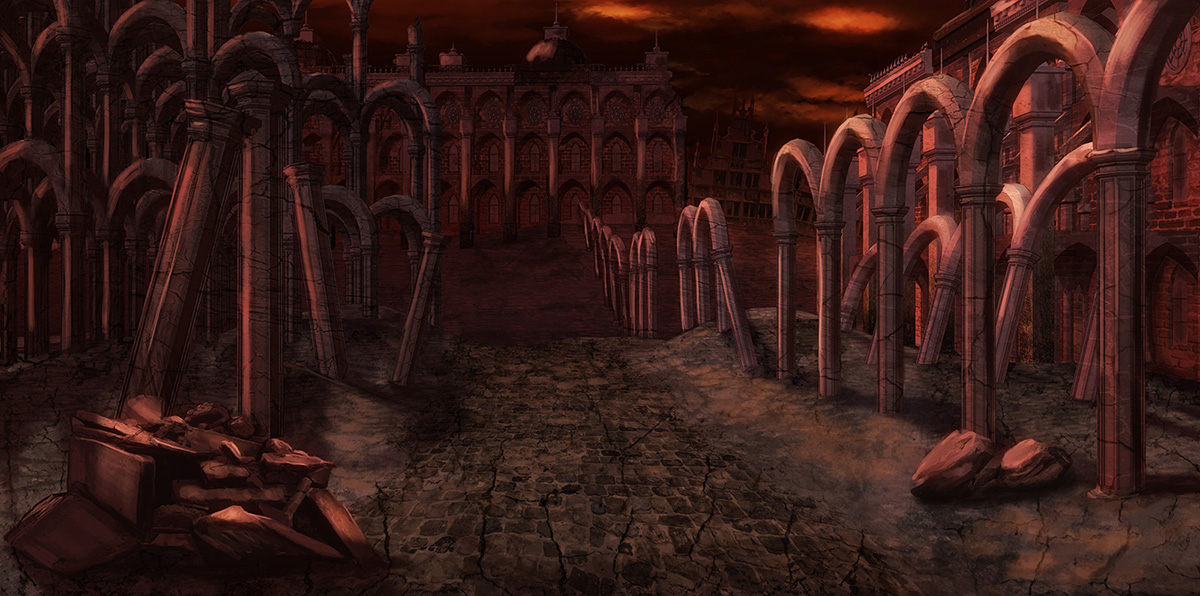
This is the last part of my work. Now the big picture is done, I focus on details. I look over the entire drawing and see what else I could improve. In this case it was light and reflection of the arches and columns. And presto! The background is finished!
And that’s the most basic example of how each of Aurora’s Nightmare backgrounds come to life. Of course, each background is different and requires individual approach, but this model of work is flexible enough for anything.
Badriel, signing off